
| Probably the only person
that is not going to think I am nuts for nailing this one is another member
of the Matsumoku.org forums who has also been around this block a
few times. An eBurnt BIN at $183 total with the hopes I come out ahead.
Nonetheless, the challenge presented itself and here was my opportunity
to try out one of the MPC guitars without the effects.
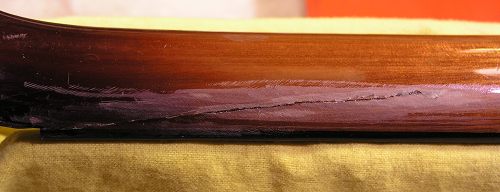
. This thing must have been drug through a tractor-trailer garage then dragged down 10 miles of rocky road. I suspect this thing has seen at least a few bar brawls in it's day, which was close to being over. The next number of shots is what I had to begin with. |
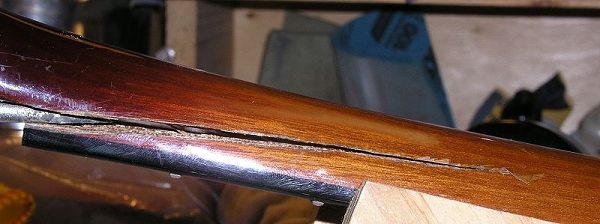
| The neck was split in multilple places. I wasn't sure if the truss was still intact but after checking, fortunately it was. Now, whether I could get the hide glue in there evenly enough to get a good bond without gluing the truss in place was the question. |
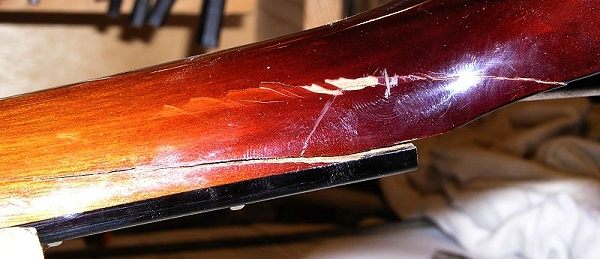
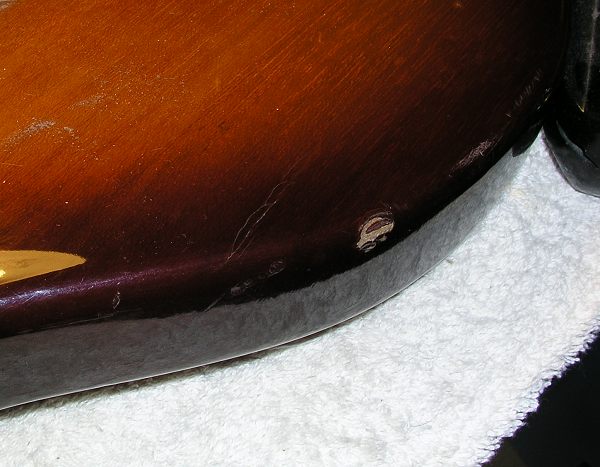
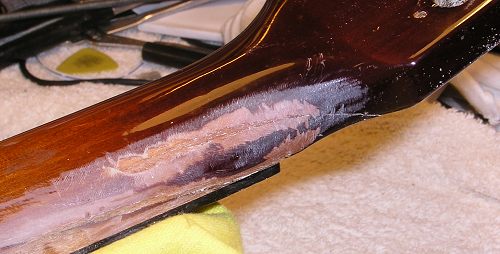
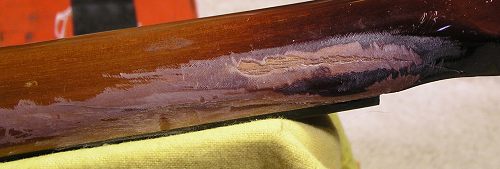
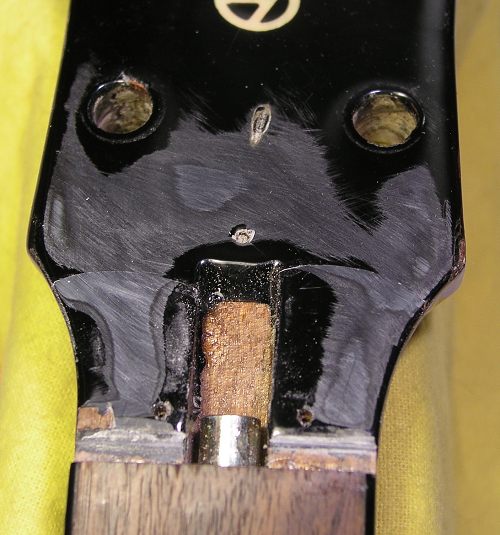
| The wood had split partway into the headstock, and every side of the headstock had some kindof of ding. |
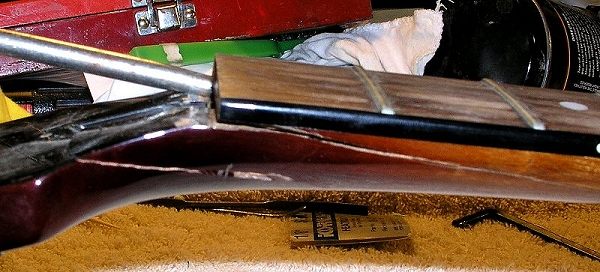
| I managed to use a syringe to slowly inject small amounts of glue into the crack being careful not to load it up next to the truss. Once I had good even and complete coverage on went the clamps and the excess cleaned off. |
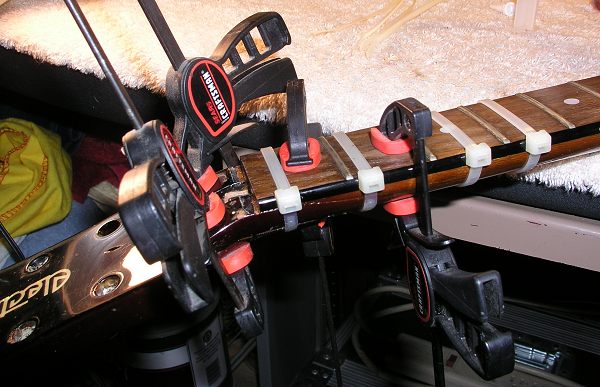
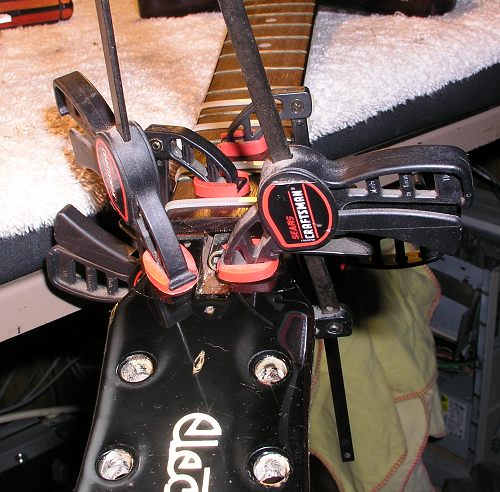

| A good 24 hours later the clamps came off and I had a good, tight, well compressed bond. Exactly what I was hoping for. Only hairlines were visible where the wood was split which means only enough glue to glue to form a lasting bond. Too much is brittle and could come undone. I have had that happen on a guitar someone else did and it left ugly bruises on my left hand where the headstock swung around and nailed me from the string tension. After roughing out the cracks I would be ready for fill and smooth. |
| In the spray booth it went with as many dings addressed as possible. There were over 50 that had to be filled. After the sealer coat on went a pseudo vintage burst. The can did spit a bit though since it was nearly empty and it looks a little lopsided to my eye on the front near the controls. This pretty much nixed the vintage burst idea. On to the next option: Opague finish. |
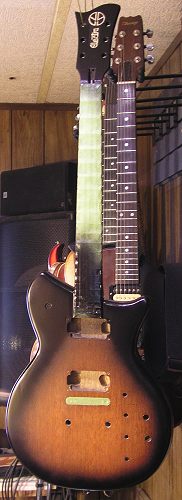
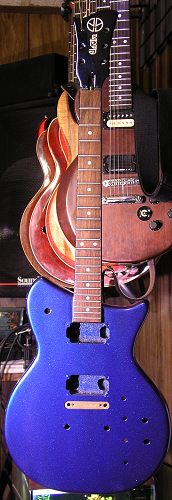
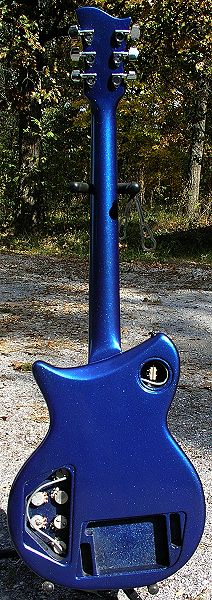
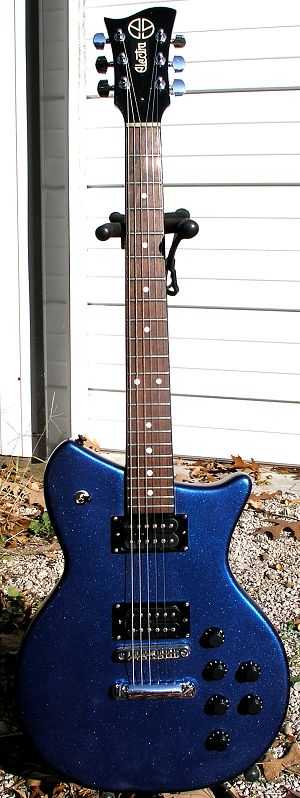
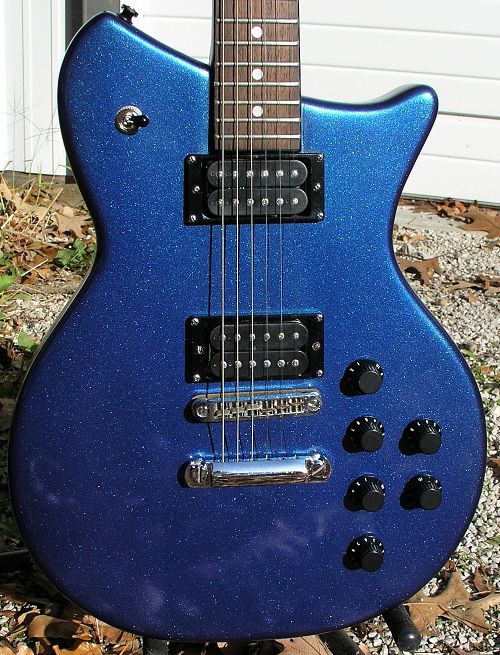
| It's one solid color now,
pretty close to the Lake Placid Blue Metalflake of Re-Ranch's. Two coats
of solid color, one dust coat to enhance the flake, and two coats of clear
is on. At least it won't look like a peg-legged one armed civil war vet
any more. Despite a near catastrophe (if there was a way to bung it up
I will find it), the winter finish is done. The reason I say winter finish
is if I'm not happy with it the way it is I'll take it down and re-do it
with the expensive Re-Ranch finish.
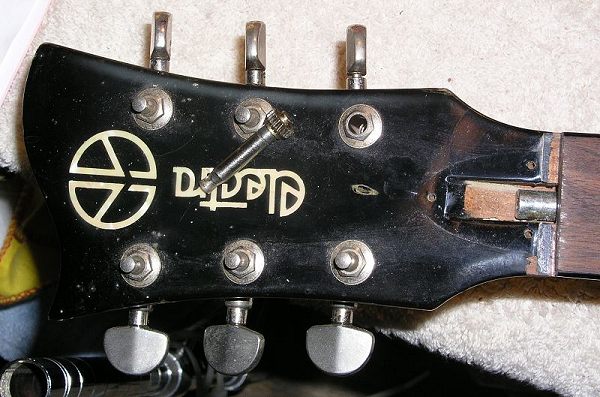
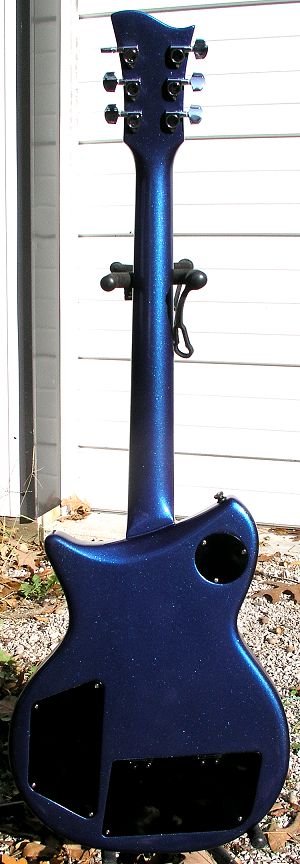
. What catastrophe you ask? I had just finished the last coat of clear and left it in the booth to cure. I came back an hour later and to my horror it had dislodged from the hook at the butt end and was laying in the bottom of the booth, bouncing! Fortunately the motor I use has a clutch and will slip if it cannot turn what is attached and the damage was confined to one edge and the tip of the headstock. I managed to touch up the damage but if you look closely you can see the metalflake lies at a slightly different angle there. You'll have to find it. . The polishing is done. I don't know what happened to the original finish on the headstock, but if you look at the original shots above you'll see that it was milked up in a number of places. I found out that went all the way down to the black base coat! I masked off the logo best I could, hit it with a light coat of black, then feathered it a bit and shot clear over it. At the right angle or close inspection you can see the masking, but I'd rather have that than all that white stuff. These are just rough shots. I took better ones outside below (indoor lighting sucks for good pictures). |
 .
.
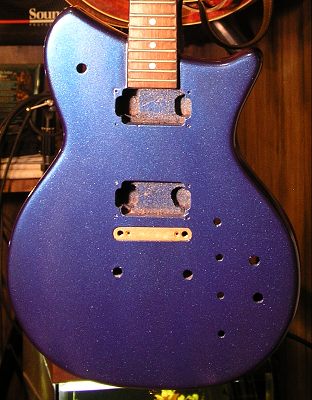
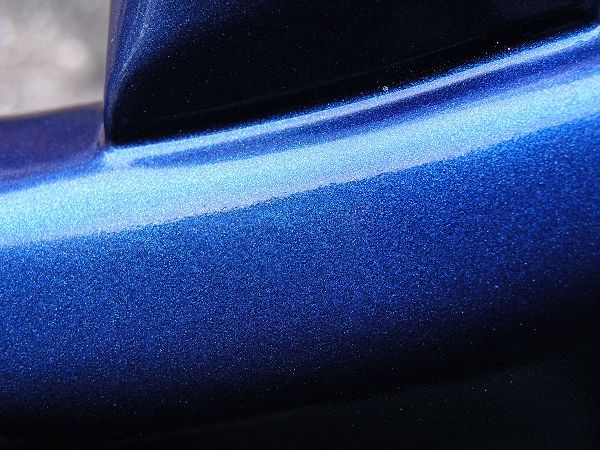
| Not the best here, but at different angles the "halo" changes color and almost has a purple tinge to it. Again, I will get better shots of it later. |
| Hopefully the vintage purists are not angry with me for changing the color scheme of the guitar. To restore it to original would have left many battle scars plainly visible without a great deal of detailed work, and even then still noticeable. For my I guess the important thing is it will play again, and not be lost to the chipper. Hopefully you guys don't hang me for finishing it in a solid color. I caught a brief moment of sunlight and these should better depict the color and subtle random sparkles seen by the naked eye. |
 .
.
 .
.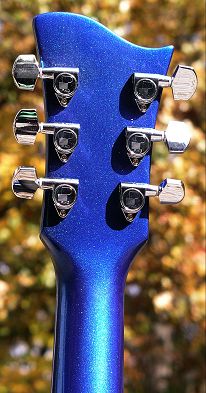
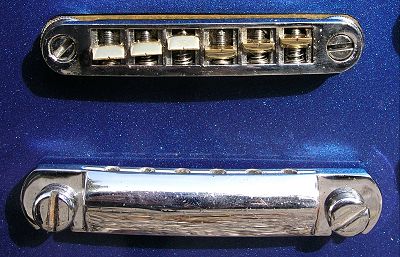
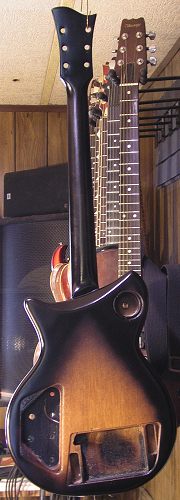
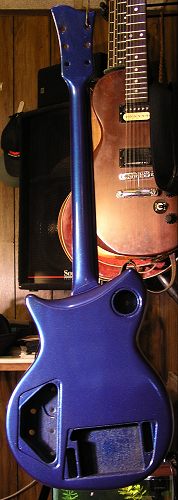
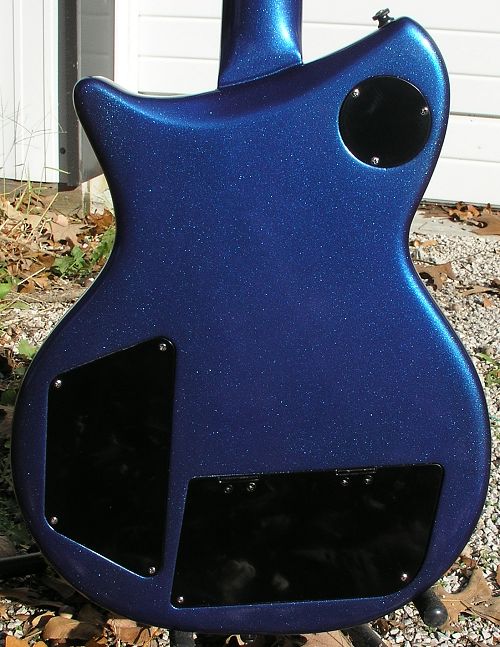
| The hardware cleaned up pretty well. There were still some finish imperfections, mostly from the fall in the booth. If you look closely at the headstock you'll see where I feebly attempted to mask off the logo, and how the original finish was milked up a bit for some reason. |
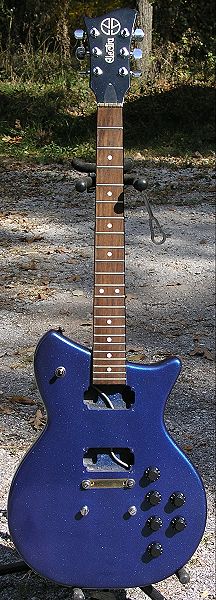
| It will be good enough for
now. All the parts are in save for pickups which XMan is trading a pair
of older DiMarzios for the SuperMagnafluxes that were in it. SMs are okay
pickups, but the DiMarzios are a little more my speed. It is alive but
I have mixed feelings about this one. It plays well, but feels more like
a clunky american guitar. I'm not too sure about the pickups either. I
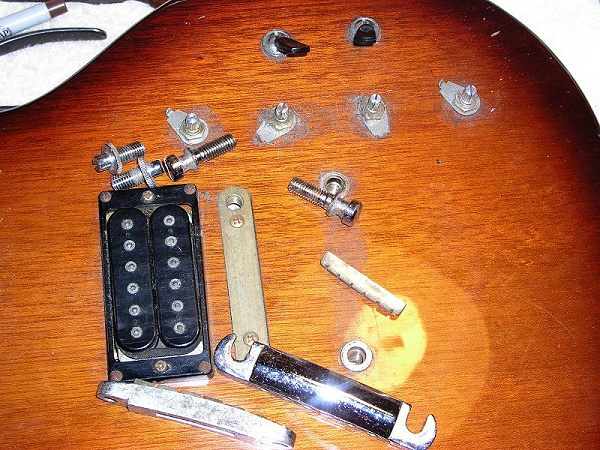
had a little work to do on them. One of them some previous owner forced
oversize screws into the mounting tabs and I had to solder a nut on the
back of each of the tabs.
. Other than this it worked out quite well. There's no evidence the neck had exploded, and no humps yet (but I will be watching). The coil cut works well, and having the variable coil cut there allows for just a little bite, more bite, or face-slicing samurai strat bridge treble. Once the last few problems are ironed out I gave it a month, and it didn't warm up to me so it went to a new home and new owner. |
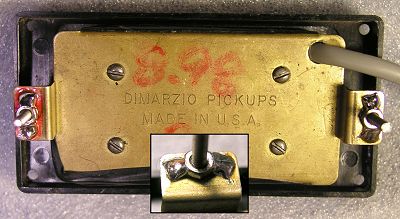
| It's not the first time I've had to do this. To the contrary, it seems this is quite common on hacks and derilicts. Luckily I had a few tiny nuts that just fit the Duncan screws I had laying around. They're slotted, and the ones on the other pickup are phillips, but I doubt anyone would notice right away. |
| Now the next problem on
the list. Fix the cavity covers. I had wet-sanded the major scratches out
of them, took them outside, and just as I was about to apply a protective
coat of semi-matte, a thousand tiny angry hairs came out of the woodwork
and attacked the mist on it's way to the surface of the control cavity
covers. I love all my critters, but sometimes they can be a pain.
. The Leslie West was somewhat of a flop and never really became popular like say the Outlaw or X3XX series so I guess in that respect it is special. It seems Leslie ended up playing other MPC guitars. . The final shots are not the best but should suffice. I don't think I ended up too bad off at roughly $225 in cash invested and about 20-30 hours work. |
 .
.
Maybe I am just being too
picky. Here is what my left hand told me. The dimensions might be a little
exaggerated but at least it's more visual than words alone.
  . Am I nuts or is this enough to throw someone off? Yup, it was enough to throw me off. I really enjoyed bringing this one back to life, and Doc, a very good friend on the east coast is now the proud owner of the guitar. Wouldn't you know his favorite color is blue, and one of his handles is "BlueAxe"? I am glad it is where it belongs and he loves the guitar. |