The Guitar Gallery Forums - The Guitar Legacy of Matsumoku

Q&A, discussion, and information for the labels covered by The Guitar Gallery (Specifically and exclusively guitars made by Matsumoku up to 1987)
It is currently Thu 18 Apr 2024 06:20 AM

All times are UTC - 5 hours


Post new topic Reply to topic
 [ 44 posts ]  Go to page 1, 2, 3, 4, 5  Next
Author Message
PostPosted: Sun 27 Jun 2010 01:27 PM 
Offline
Virtuoso
User avatar

Joined: Wed 29 Apr 2009 12:32 PM
Posts: 3955
Location: St. Catharines, Ontario Canada
Man, as if I don't already have enough sagging things...along comes this!

Image

My beloved Dano U2 has finally succumbed to the dreaded sagging or warping bridge, apparently a common problem with these '56 reissues. It had been playing just fine until recently when I noticed a a couple of buzzing notes at the second and third fret on the D and G strings. I had a look and didn't notice anything unusual, but my local guitar guy saw a bit of a back bow in the neck and reckoned that a tweak of the truss rod would be in order.

Well, easier said than done! For those who are not aware, access to the truss rod requires removal of the neck! The nut is in the heel. (sigh)
Since the strings had to be lifted from the bridge anyway, I decided to replace the 9's that I had on it with some pure nickel 10's for a more vintage sound. Long story short, the good news is that I got rid of the first position buzzing...the bad news is that I now have buzzing around the 10th and 11th fret, still on the D & G strings!

I checked the neck again and I guess the extra tension from the heavier strings had pulled the neck up too much, so...off came the neck a second time! The neck was fine but the buzzing continued. Then I paid some attention to the bridge. It had always had a swayback to it but I thought it was just the design of the thing since the guitar was playing fine. Now I realize that the metal is collapsing (sagging) from the tension on the D and G strings! The other 4 strings are fine and do not cause buzzing.

So here's the dilemma: if I raise the bridge to clear the middle two strings then the rest of them are way too high and uncomfortable to play; if I adjust the outer strings correctly the middle two buzz at some point on the neck!
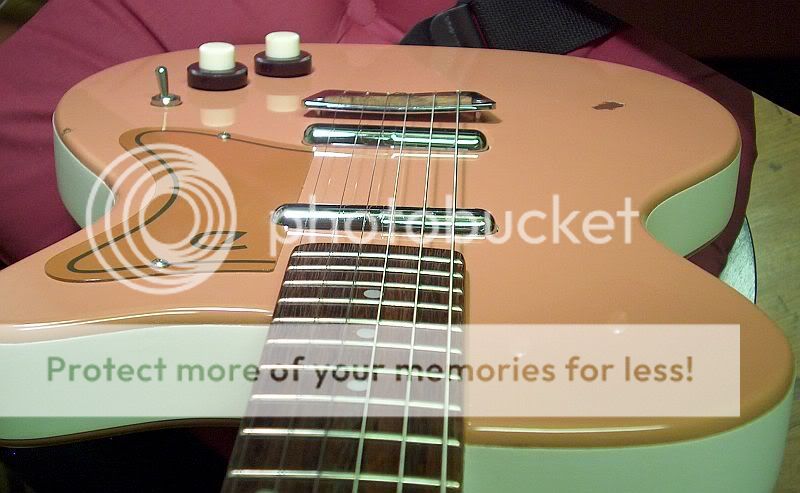
Here are a few more shots of the condition:
Image
Image
Image

There is an adjustable replacement bridge available for these "vintage" designs but I'd rather keep the original design with the rosewood saddle. It does contribute quite a bit to the sound believe it or not. We A-B'd mine with a new DC59 in the music store. The metal bridge on that one does sound different.

From my "research" I understand that the famous Dan Erlewine addresses this repair in one of his DVD's, and he apparently adds another wood screw underneath to support it, after first flattening out the metal of course. I haven't been able to find out exactly how he's doing it however.
My thinking is more along the lines of some sort of telescoping or adjustable bolt of some kind. Or perhaps something very simple like a hard wood wedge?? Dunno.

Any thoughts or suggestions? Keep in mind the construction of these guitars: poplar bracing covered with Masonite! There ain't a lot of fastening points or strength. and of course you don't want to interfere too much with the vibration transmission through the bridge, that's also a factor in the sound of thees things.

Thanks for your consideration guyz!

_________________
Guitars: https://legend.barryeames.com
Music/Pix/Videos: https://getback.barryeames.com


Top
 Profile  
Reply with quote  
PostPosted: Mon 28 Jun 2010 05:04 AM 
Offline
Virtuoso

Joined: Tue 19 Feb 2008 04:58 AM
Posts: 548
Location: That "cultural nerve center", Mid-Atlantic U.S.
Uh... what made you decide to put a 10 set on a Masonite Dano?

You could jack the bridge way up & make it a slide guitar a la David Lindley. :D

EL RAYO X

I THINK the way to do it is to replace the center screw with one that's threaded all the way to the head, insert it through the bridge, & before re-installing the straightened bridge, either (1) "double nut" it with two relatively thin nuts (torque two nuts together, & there's never a need for lock-tite; bonus to this method is it's adjustable) or (2) just use one of those locking nuts with the plastic locking sleeve in the threads (also adjustable). Epoxy, super-glue, or lock-tite is overkill.

It's easiest to adjust the "double nut" with two cheap wrenches cut out of thin sheet metal (they're the cheap wrenches that come with assemble-it-yourself furniture or the old [toy] Erector Sets). If you have bad eyes or fat fingers, a washer or two between the nuts can help (& they don't have to be lock washers--the torque of the 2 nuts will hold everything together)... or just use the locking nut.

It's probably best to re-install the straightened bridge with the nut(s) loose, & when you have the bridge in place, snug the nut(s) up against the bridge (or if using the "double nut", snug nut #1 against the bridge, hold it in place with a wrench, & tighten nut #2 against it--the nuts won't move again until you want them to).

If I'm not explaining clear enough, I'm sure Racing can clarify. The "double nut" is an old-school way of mounting pulleys (& other odds & ends) so that you don't crush the sealed bearings that are pressed into the center of them (or covers, or other stuff)--although anymore, it's probably used more on farm & industrial equipment than on hot rods & race cars (not a very clean look with all of those chrome covers & custom machined parts).

If there's a way of adding another screw, I'm not familiar enough with the design to know how to do it.


Top
 Profile  
Reply with quote  
PostPosted: Mon 28 Jun 2010 09:40 AM 
Offline
Virtuoso
User avatar

Joined: Wed 29 Apr 2009 12:32 PM
Posts: 3955
Location: St. Catharines, Ontario Canada
Why 10's? Cuz they didn't have any pure nickel 9's! :P
Seriously though, the 9's were sounding a tad rattle-y on the neck. The Dano already has a chimey and metallic enough sound and doesn't benefit from the extra string noise. But the gauge didn't cause the problem, it was already present with the 9's installed. What it did do was shift the buzz problem to a different part of the neck.

I am familiar with double nutting, and I was thinking of doing something similar to what you describe Slo, but not where you suggest. The origin of the problem is not with the existing centre screw. That, in fact, is the only fastening point for this bridge! Those outside adjustment screws do not go through the holes, but are underneath, and the bridge rests on their heads. You adjust them via the holes in the top (simple wood screws by the way!).

No, the problem is in the thinness of the metal itself versus the string compression from above. It needs additional support either in the middle or towards the front to stop it from sagging. Your suggestion is going in the right direction I think, but there are some problems to overcome when you move it forward, not the least of which is the fact that it would have to penetrate the saddle.

I wish I knew what Erelwine's solution was. I suspect that he's using a wrench adjustable screw of some sort. The fundamental question though is, where do you sink it? I'm not sure what's under that part of the Masonite top. If it's hollow...!

_________________
Guitars: https://legend.barryeames.com
Music/Pix/Videos: https://getback.barryeames.com


Top
 Profile  
Reply with quote  
PostPosted: Mon 28 Jun 2010 09:41 AM 
Offline
Virtuoso
User avatar

Joined: Mon 19 Mar 2007 08:50 AM
Posts: 1588
If you can straighten the bridge, I would try a simple piece(s) of wood, say cut from a dowel. It should provide the support without having to mod anything. You will have to measure with care but dowels are cheap if you get it wrong the first few tries. Good Luck.


Top
 Profile  
Reply with quote  
PostPosted: Mon 28 Jun 2010 10:01 AM 
Offline
Virtuoso
User avatar

Joined: Wed 29 Apr 2009 12:32 PM
Posts: 3955
Location: St. Catharines, Ontario Canada
Thanks Nevin. I prefer a simple, non-invasive approach too.
I was originally thinking of a hard wooden or rubber wedge of some sort, but a dowel might just do the trick. The next question is, lengthwise or on end? Stronger I suppose on end, but I'm a little nervous about maybe punching through the Masonite since I do not know what's under there.

I'm going to have another look around the web and see if there's a picture of the inside of one of these beasts, particularly the bridge area. That's the only way I can be sure of what to do.

_________________
Guitars: https://legend.barryeames.com
Music/Pix/Videos: https://getback.barryeames.com


Top
 Profile  
Reply with quote  
PostPosted: Tue 29 Jun 2010 02:20 AM 
Offline
Virtuoso

Joined: Tue 19 Feb 2008 04:58 AM
Posts: 548
Location: That "cultural nerve center", Mid-Atlantic U.S.
I think a "wrench adjustable screw" is called "a bolt". :D (Please don't be P.O.'ed with me, Barry. I couldn't resist.)

This is what a luthier friend of mine said to do:

IFF the wood is solid under the bridge, drill a pilot hole directly under the center of the bridge & use a simple wood screw. If you want to overdo it, you can drill a hole for inserting a bridge stud mount. You can use the screw that comes with the mount if you want (it'll be a little harder to adjust, like the plain old screw), or you can replace it with a bolt.

If the body isn't solid in the middle of the bridge, the way that sounds best to me would be to drill a hole & glue in a threaded ferrule for the screw (if the ferrule doesn't have a big enough rim, you can use a washer to help spread the pressure over more of the top).


Top
 Profile  
Reply with quote  
PostPosted: Tue 29 Jun 2010 06:01 AM 
Offline
Virtuoso

Joined: Tue 19 Feb 2008 04:58 AM
Posts: 548
Location: That "cultural nerve center", Mid-Atlantic U.S.
Hey Barry:

Is the bridge on this thing hollow? If it is, I got's an idea. Get a big ol' syringe from a farm supply store. After straightening the bridge, drill out two small holes in the bottom of it, mix up a bunch of slow-curing, high-shear epoxy, & fill the bridge with epoxy. Let it sit for about a week, & the epoxy resin should make it plenty rigid.

Or, if the underside of the bridge doesn't have a back on it (like a shell), straighten it out & epoxy a nice thick slab of metal plate underneath.

It won't get bent again.


Top
 Profile  
Reply with quote  
PostPosted: Tue 29 Jun 2010 08:09 AM 
Offline
Virtuoso
User avatar

Joined: Mon 19 Mar 2007 08:50 AM
Posts: 1588
Since Slow Hand has the high tech ground I will stick to the low tech. If you can't straighten the bridge you could change the string slots. The bridge sadle is wood so it should be fairly easy. If you file the outer slots deaper and raise the bridge you should be able to return the strings to the correct camber


Top
 Profile  
Reply with quote  
PostPosted: Tue 29 Jun 2010 10:58 AM 
Offline
Virtuoso
User avatar

Joined: Wed 29 Apr 2009 12:32 PM
Posts: 3955
Location: St. Catharines, Ontario Canada
Thanks guys.
slo-hand wrote:
I think a "wrench adjustable screw" is called "a bolt"...

Slo, I was thinking along the lines of a hex head wood screw which is wrench adjustable underneath the bridge plate:
Image

As mentioned, I understand Erlewine uses a wood screw as a fix. It's about as simple as you can get and fits the retro/primitive design of this guitar very well, but I don't have the details as to how he's doing it or what exactly he's using. That would imply that there is something solid underneath. But the only pictures I could find of the inside of the U2 is a fuzzy scan of an original sales flyer from 1956. It shows some cutaway drawings (no photos) of such features as the double truss rod and there is one indistinct picture of a block of wood under the bridge area. What I don't know of course is whether my Korean reissue follows this design faithfully, but I'm guessing it does.
I found one actual picture of a DC59 model under re-construction and it does have a solid block. The body shape is different but it's essentially the same layout inside. Shoving a screw in is the easy part, but adjusting it is the pain in the arse.

I like the idea of filing the string slots Nevin, but I have no guarantee that the metal won't continue to sag until it eventually hits the body.
I'm kinda liking the metal plate reinforcement idea Slo, except that there isn't a lot of space, and it might compromise the sound?? The bridge is a chromed, flat metal plate but I'm not sure what the metal is (brass I'm guessing).
http://www.danguitars.com/Parts.html

Arggghhh!

_________________
Guitars: https://legend.barryeames.com
Music/Pix/Videos: https://getback.barryeames.com


Top
 Profile  
Reply with quote  
PostPosted: Wed 30 Jun 2010 02:26 AM 
Offline
Virtuoso

Joined: Tue 19 Feb 2008 04:58 AM
Posts: 548
Location: That "cultural nerve center", Mid-Atlantic U.S.
Hey Barry.

I've seen hex-drive screws. I was just being an idjit. :loon:

Dano still makes a model very similar to yours--the only difference is the double cutaway. E-mail Marcy at marcy@danelectro.com & "she" might be able to help.

If Dano is no help, is there any chance you live near a relatively major airport? You could take off the bridge & neck & X-Ray the body at the luggage scanner if they'll let you.

If you just can't determine whether it's completely solid or not beneath the bridge (& I can't imagine why it wouldn't be, given the two supporting end "pins" & the center screw), drill a small pilot hole under the center of the front of the bridge to see whether it's solid or not. If it's solid, just use a wood screw. If it isn't solid, the ferrule/washer idea is the best bet. Use a ferrule that's threaded on the inside--it should have a small flange to serve as a "stop". Since the Masonite is questionable as to strength, find a larger diameter washer with a center hole that matches the outside diameter of the sleeve of the ferrule. Drill a hole to accept the sleeve of the ferrule, & you can install the ferrule/washer with or without glue (I'd glue it so the washer would reinforce the Masonite). Then just find a screw to fit the ferrule (if one isn't already included).

Another option is to use a deck of playing cards (or business cards, or maybe those big flat triangular picks, maybe slugs or coins, or whatever) & stack them as high as you need them. If you like how this works, you can make it more permanent later.


Top
 Profile  
Reply with quote  
Display posts from previous:  Sort by  
Post new topic Reply to topic  [ 44 posts ]  Go to page 1, 2, 3, 4, 5  Next

All times are UTC - 5 hours


Who is online

Users browsing this forum: No registered users and 1 guest


You cannot post new topics in this forum
You cannot reply to topics in this forum
You cannot edit your posts in this forum
You cannot delete your posts in this forum
You cannot post attachments in this forum

Search for:
Jump to:  
Powered by phpBB® Forum Software © phpBB Group