The Guitar Gallery Forums - The Guitar Legacy of Matsumoku

Q&A, discussion, and information for the labels covered by The Guitar Gallery (Specifically and exclusively guitars made by Matsumoku up to 1987)
It is currently Fri 19 Apr 2024 12:49 AM

All times are UTC - 5 hours


Post new topic Reply to topic
 [ 21 posts ]  Go to page 1, 2, 3  Next
Author Message
 Post subject: Restoring a CSB BnG
PostPosted: Fri 25 Feb 2011 10:14 PM 
Offline
Virtuoso
User avatar

Joined: Tue 27 Oct 2009 02:53 AM
Posts: 480
Location: Strailya
Hey Folks, touched on this Bass briefly a while ago here. viewtopic.php?f=36&t=6748.
I did promise a write up , so here it is.
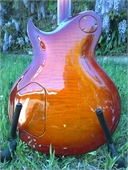
Bass was in very sad condish when I got her, as you will no doubt gather from the pics.
Also, when I plugged her in, no workies.
Okay, so i'll start with the finish repairs.
I've been experimenting a bit lately using polyester resin in place of cyanoacrylate for drop filling.
Main reason being problems associated with tinting the cyano.
Deep fills are also a pain with the cyano as so much of it evaporates in the drying process.
Polyester resin colors easily with the use of pigments, mix & match.
As far as I know the original finishes are polyester, so no prob there.
Anyhow, I figured this baby was a good candidate for the treatment.
Black is one of the easiest colors to touch up, but it is also one of the hardest, I'll explain.
Repairs on Black finishes, no matter how average, look good from six feet away.
But, the closer you get the worse they look, for a few reasons.
Firstly, theres' black & theres' black and then again theres black.
What I'm getting at, is, if you compare a whole heap of black objects side by side you quickly come to realise the differences in the shade & depth of their finishes.
Some blacks are a kind of dark browny black & others are almost a dark bluey black, & everywhere in between
What once looked the same is now quite different.
How this complicates black finish touch ups is now apparent.
Further compounded by the super reflective glossyness (is that a word)of the finish.
So, in summary, you want to try for a repair that is undetectable from 2 feet away.
Here's what i have done here.
Firstly you need to prepare the damaged area.
When a black finish gets impact damage it shatters.
The shattererd finish looks white.
If you were to fill over this with clear cyano, it would be filled sure, but still very visable.
The polyester repair mix when prepared, although pigmented is still translucent.
This factor makes the next step quite important.
What you need to do is get a pointed blade & remove all of the shattered finish
, as you can see below.
Image
Image
Image
Image
Image
Image
Image

_________________
My Guitars- http://matsumokuguitars.com/


Last edited by Trevor on Mon 28 Feb 2011 01:49 AM, edited 3 times in total.

Top
 Profile  
Reply with quote  
 Post subject: Re: Restored CSB BnG
PostPosted: Fri 25 Feb 2011 10:32 PM 
Offline
Virtuoso
User avatar

Joined: Tue 27 Oct 2009 02:53 AM
Posts: 480
Location: Strailya
As you can see quite a Mess.
Now you need to start mixing your clear polyester resin filler.
Small quantities is all you need around 10ml
This is the tricky part, color matching.
I start with adding black pigment (it only takes a small amount) then compare it with your guitars finish.
You may need to add other pigment colors, red blue etc, in tiny amounts to get it dead right.
Once your sure the color is right add the catalyst, or tip it out & start again, don't be afraid to bin bad mix's.
If the colors gone to far one way your better off to start fresh.
Assuming you have the color right & have added the catalyst, drop fill the same as you would with cyano.
I prefer to use a toothpick to dip & drop with as I find it the most accurate.
Fill to a nice raised dome shape, done.
as this can only be done to areas that are sitting level, you will need to do this many times, rotating an turning the guitar to be able to do all areas. Edges are the worst & require patience.
Image
Image

_________________
My Guitars- http://matsumokuguitars.com/


Last edited by Trevor on Fri 25 Feb 2011 11:58 PM, edited 1 time in total.

Top
 Profile  
Reply with quote  
 Post subject: Re: Restored CSB BnG
PostPosted: Fri 25 Feb 2011 10:50 PM 
Offline
Virtuoso
User avatar

Joined: Tue 27 Oct 2009 02:53 AM
Posts: 480
Location: Strailya
Give your final repair a couple of days or so to dry fully and then we're onto the next step.
A word of caution, as with the cyano the poly will appear hard & dry within hours of application.
Leave it, dont be tempted to start shaving it back.
The force will break the bond on the edges of the repair, then you won't be able to get a proper blend into the finish, as it will continue to break away on the edges.
If you started to soon the damage is done.
Even when you are down to 2000 wet & dry it still will not feather properly.
So, lets assume everything has gone right.
Scrape it back as you would a cyano drop fill.
I use a razor blade with 2 layers of sticky tape wrapped around either end to give scratch protection from the sharp corners & to give a small clearance so the repair is still slightly raised when finished.
Once the blade does not remove any more poly its time to start with the papers.
I back the paper with a small wooden block, around 20 X 15mm.
Starting with 800, all sanding is done wet.
Working over the repair, you are done when the poly in the repair is blended with the finish.
This is when there is no longer a shiny edge left around the repair, fully blended.
At this stage you may find some of your repairs need more filler, FILL them, dont be tempted to sand further into the original finish to get it to blend properly.
Repeat this process with all repairs.
Image
Image
Image

_________________
My Guitars- http://matsumokuguitars.com/


Last edited by Trevor on Sat 26 Feb 2011 12:04 AM, edited 1 time in total.

Top
 Profile  
Reply with quote  
 Post subject: Re: Restored CSB BnG
PostPosted: Fri 25 Feb 2011 11:04 PM 
Offline
Virtuoso
User avatar

Joined: Tue 27 Oct 2009 02:53 AM
Posts: 480
Location: Strailya
When all of the repairs are again at the same stage, its time to change paper.
Now go to 1000, again use wet with the small block.
Look carefully, notice the finer scratches you are sanding over the older 800 work.
Sand all repairs untill none of the previous scratches from the 800 remain, sanding further outward from each repair into the virgin finish (oohhoohhoo I just got a tingle then)
Repeat again with 1200 grit, now I tend to start doing the whole guitar, lock stock & barrel.
Next 1500, all still with the small block where ever you can.
Almost there.
Now the final sand.
2000, wet, no block, just the fingers, trying to keep as even a pressure as possible.
Small note, I sometimes, especially on black finishes, will do 2 complete goes with the 1500 & then even 3 with the 2000, just to be sure there are no scratches from the previous papers.
Image
Image

_________________
My Guitars- http://matsumokuguitars.com/


Top
 Profile  
Reply with quote  
 Post subject: Re: Restored CSB BnG
PostPosted: Fri 25 Feb 2011 11:21 PM 
Offline
Virtuoso
User avatar

Joined: Tue 27 Oct 2009 02:53 AM
Posts: 480
Location: Strailya
Now its time to get the Automotive buff out.
Starting with a fine regular compound on an orange foam pad.
Do the whole guitar, inc the fret board, this will also effortlessly polish the frets.
Usually at this stage i will have also leveled & re-crowned the frets & finished them with papers.
Next, change to a white foam pad & use a finer polishing compound. I use "Autoglym ultra fine renovator", its a professional body shop product. Buff the whole guitar excluding the fretboard, as it is now finished.
Change pads again, I now use a black foam pad.
The final compound I use with the black pad is "Malco Swirl Remover".
A word of caution, the last 2 compounds really heat the finish, Its caused by the increasing friction generated by the finer & finer foam pads. BE CAREFULL. Too much heat will bubble & destroy the finish, dont stay in one spot too long.
If all has gone well this will be your reward.
Image
Image
Image

_________________
My Guitars- http://matsumokuguitars.com/


Top
 Profile  
Reply with quote  
 Post subject: Re: Restored CSB BnG
PostPosted: Fri 25 Feb 2011 11:51 PM 
Offline
Virtuoso
User avatar

Joined: Tue 27 Oct 2009 02:53 AM
Posts: 480
Location: Strailya
Now I generally give the fretboard a good scrub with a tooth brush, water & pump soap to remove any remaining buffing compound.
Image
Image
Image
Now comes the re-assembly.
I had to repair the pickup on her before I could go any further.
A simple hookup wire separation from the winding wire.
5 minutes with the soldering iron & all fixed.
Spray the pots with contact cleaner , install.
Install the Pickup & solder to the pots.
Next comes the bridge.
By this stage I will have already dis-assembled & gone over it thoroughly.
Freed or replaced any stuck saddle height adjusting screws, removed any surface rust from the intonation screws, cleaned, lightly oiled & re-assembled the whole thing.
Install.
Next the nut.
With the Brass nut on the BnG's I will buff it to a mirror finish and then give it a few coats of a clear finish, designed specifically for copper, brass & bare alloy finishes. you can get in pressure pack cans from a general hardware supply.
Once dry make sure the nut slot is clean, a drop of cyanocrylate & install.
Tuners.
Gold is a B!tch.
All you can do is give it a light clean.
Any remaining gold rubs off very easilly.
I clean very lightly with Meguiars scratch X 2.0.
If their Chrome or Nickel I use Brasso.
If they are at all serviceable, I will replace nylon bushes & grease or oil where ever I can, & set an even tension with the knob screw shaft.
Install.
Now give the fretboard a couple of liberal goings over with an oil of your choice,
Throw on some new wires & there you go.
Image
Image
Image
Image
Image
Image
Image
Image

All that remains now is a full setup.
But thats another story. :D

_________________
My Guitars- http://matsumokuguitars.com/


Top
 Profile  
Reply with quote  
 Post subject: Re: Restored CSB BnG
PostPosted: Sat 26 Feb 2011 01:12 AM 
Offline
Virtuoso
User avatar

Joined: Wed 29 Apr 2009 12:32 PM
Posts: 3955
Location: St. Catharines, Ontario Canada
Absolutely first class work Trev! :rockwoot: :clap:
Thank you for detailing all your work. It'll serve as a text book reference for we poor buggers still trying to resurrect the dead with screwdrivers and sticky tape!

Perhaps a "sticky" is in order mods?

_________________
Guitars: https://legend.barryeames.com
Music/Pix/Videos: https://getback.barryeames.com


Top
 Profile  
Reply with quote  
 Post subject: Re: Restored CSB BnG
PostPosted: Sat 26 Feb 2011 01:28 AM 
Offline
Virtuoso
User avatar

Joined: Tue 27 Oct 2009 02:53 AM
Posts: 480
Location: Strailya
Barry wrote:
Thank you for detailing all your work.


A Pleasure Barry.
If my Humble repair work inspires someone to fix up a deserving old Mat, Its well worth it. :D

_________________
My Guitars- http://matsumokuguitars.com/


Top
 Profile  
Reply with quote  
 Post subject: Re: Restored CSB BnG
PostPosted: Sat 26 Feb 2011 01:36 AM 
Offline
Virtuoso
User avatar

Joined: Sat 25 Mar 2006 09:25 PM
Posts: 3196
Location: Grand Absurdity, TX
Outstanding! :love:


Top
 Profile  
Reply with quote  
 Post subject: Re: Restored CSB BnG
PostPosted: Sat 26 Feb 2011 04:03 AM 
Offline
Virtuoso
User avatar

Joined: Wed 05 Jul 2006 03:40 PM
Posts: 2608
Location: Mount Hunter, NSW, Australia.
Outrageous!! :up: :up:


Top
 Profile  
Reply with quote  
Display posts from previous:  Sort by  
Post new topic Reply to topic  [ 21 posts ]  Go to page 1, 2, 3  Next

All times are UTC - 5 hours


Who is online

Users browsing this forum: No registered users and 2 guests


You cannot post new topics in this forum
You cannot reply to topics in this forum
You cannot edit your posts in this forum
You cannot delete your posts in this forum
You cannot post attachments in this forum

Search for:
Jump to:  
Powered by phpBB® Forum Software © phpBB Group